
Back in November I wrote a post called ‘An Introduction To Office Back’. The article explained why a lot of the back, shoulder and knee pain that we get can be largely caused by the huge amount of sitting that we do.
What Causes ‘Office Back’?
We sit to eat breakfast, we sit on the train to work. We sit at our desks while we work then we sit on the train again on the way home. We sit and eat dinner, then we sit and watch TV to relax. At night we curl up into a foetal position while we sleep to get comfortable which essentially is the sitting position while lying on your side.
All of this sitting based behaviour causes bio mechanical adjustments in the body, the outcome of which can leave us injured and in chronic pain.
Poor Posture
If you imagine the brain being a stereo system and the muscles are the speakers. When we sit for long periods and the joints are in a permanently flexed state, the stereo turns up the volume on the speakers making them louder, or in the muscles case, making them contract much more tightly. This creates an effect called hypertonicity.
In the office back scenario, this mostly affects the muscles on the front of the body; specifically the front of the hips (the hip flexors), the front of the thighs (the quadriceps), the chest (the pec muscles) and front of the shoulders (the deltoids, particularly the anterior deltoid) are all affected the most.
Muscles work in pairs, moving the joints in opposing directions. If one of the pair is permanently contracted, it has a very obvious effect on the other muscle in the pair (the antagonist).
The opposing muscles become weak, lengthened and stretched. As an effect of this constant stretching, the brain causes the muscles to contract to prevent an over stretch and an injury. This is called reciprocal inhibition.
The outcome is weak, lengthened yet contracted muscles that often ache and in some causes can be quite painful. The muscles become tight, tense and adhesions or ‘knots’ are often formed, which further weaken the muscle and limit its flexibility.
This largely affects the back of the body; shoulders and upper back (the trapezius and rhomboids), the spinal muscles the lower back area (there are lots of muscles here but the erector spinae and multifidus muscles are the main areas impacted), the backside muscles (glutes) and the back of the legs (the hamstrings and calves). In other words, all the bits of you that ache, the majority of the time.
The Remedy For Postural Pain
The remedy of the back and shoulder discomfort that our office backs cause is set into three areas. Myofascial release, stretching and strengthening, which need to be completed in that order.
This post is to help you with myofascial release, to help reduce the tension in the muscles to make them more relaxed.
Foam Rolling
Myofascial release is more commonly known as foam rolling or trigger pointing. This is one of the best ways to release tension in the muscles and can have an immediate effect.
Most gyms have foam rolls these days and if you are not a gym member you can buy them cheaply enough online. You can also get great results in harder to reach areas, (like the shoulders for example), with a simple tennis ball.
The rolling of the muscles stimulates the nerve receptors causing the muscles to relax and release their tension. The process can be quite uncomfortable at first which is normal and will get easier as the muscle tension releases over time.
Please remember if you have any constant excessive pain in the lower back, or pain that refers into the legs, do seek medical advice before you start this type of programme.
Using Myofascial Release / Trigger Pointing To Help The Muscles Relax
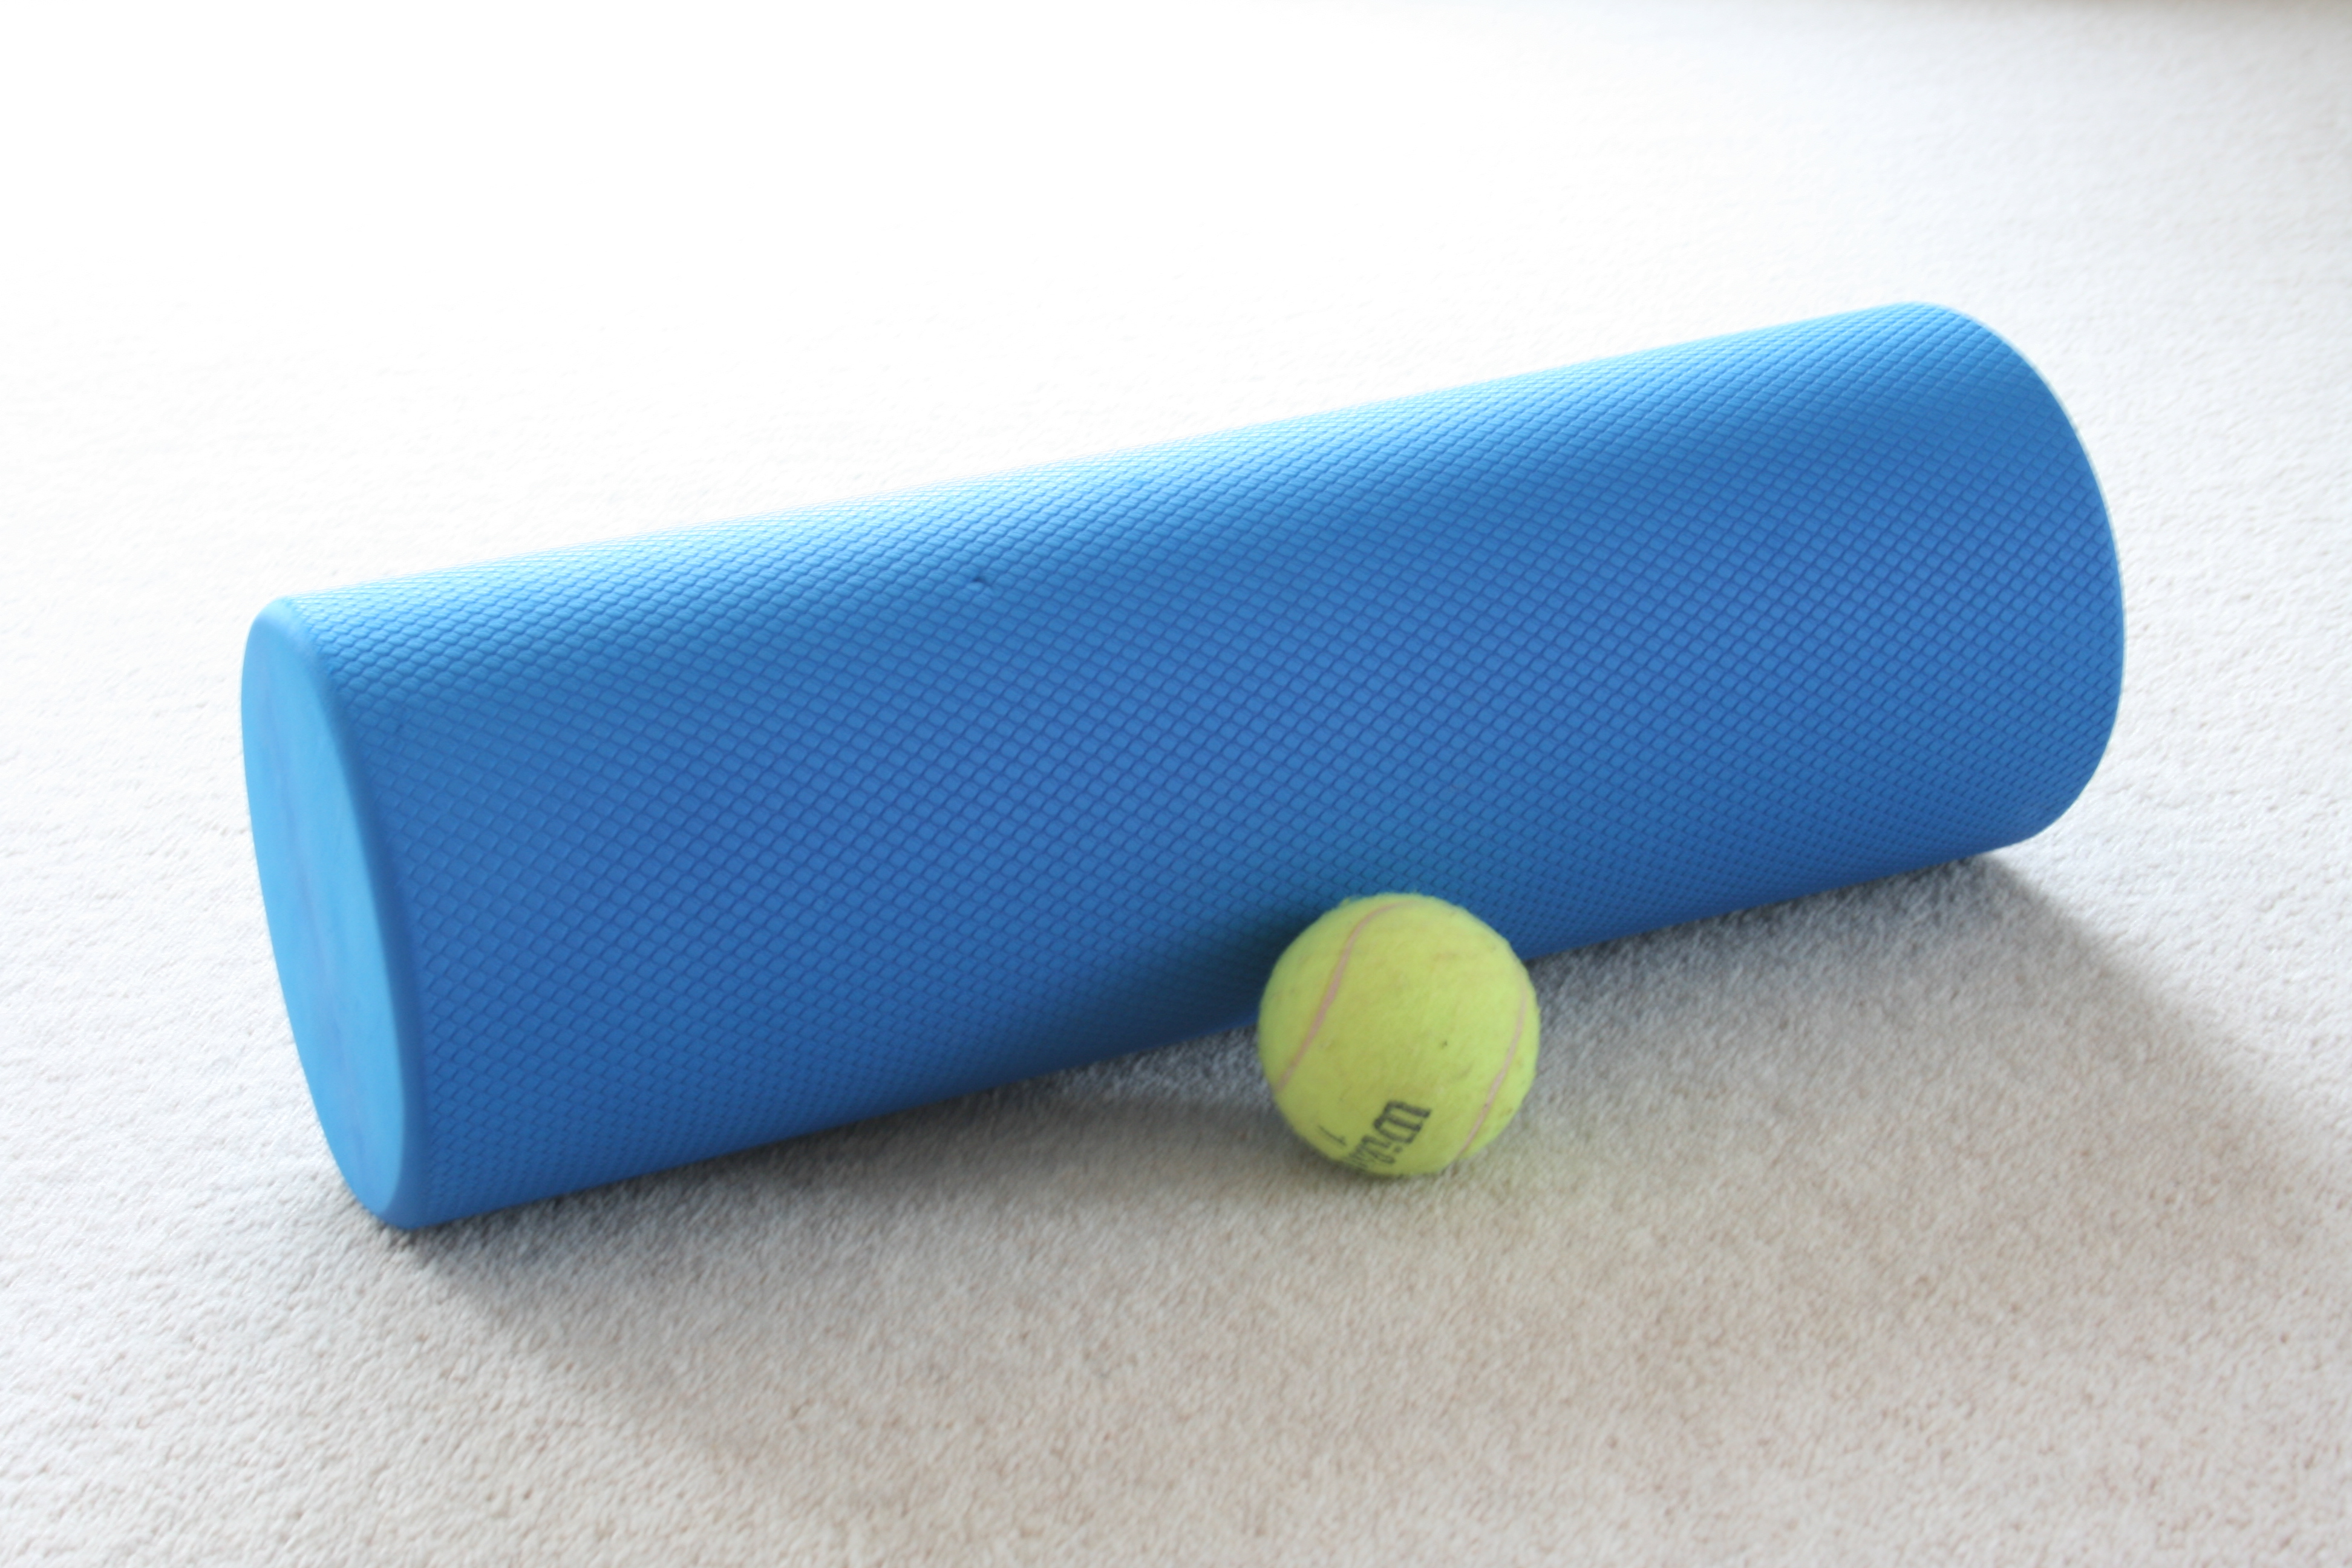 You will need a tennis ball and a foam-roll to continue. This tutorial covers how to reduce the stress and tension in the back of the body to help release the knots and stress tension to improve your posture and reduce your discomfort.
I will warn you before you start. If you have been experiencing pain, stress tension, knotted muscles, etc, this WILL be uncomfortable. The areas we are working on are referred to as trigger points. They will feel nervy, sharp, and may refer pain around the body to other areas.
All of this is normal and will subside with time as your muscles relax. As a word of safety, you should never roll across bone or your joints, especially the spine. Keep it on the muscles people.
How To Perform Self-Myofascial Release
You can trigger point the muscles in two ways. You can find the spot and hold it; this will hurt and will initially feel sharp and uncomfortable. With practice it will stimulate the nervous system to relax and in time the discomfort will subside, leaving your muscles feeling lighter and more mobile.
The second option is to move the ball or foam roll over the area dynamically. This replicates a sports-massage and promotes elasticity in the muscles. This may help if you are especially tight as the ball or foam roll will be working over the area and not directly on it if it’s to painful to bear to hold it statically.
Use the diagrams below as a guide to locate and work on your tight spots. Remember – stay away from the spine and stay on the ‘belly’ of the muscles. I have included some pictures to give you an idea of the position that you should be in when doing the exercises to get the best results.
The Shoulders & Upper Back – use the tennis ball.
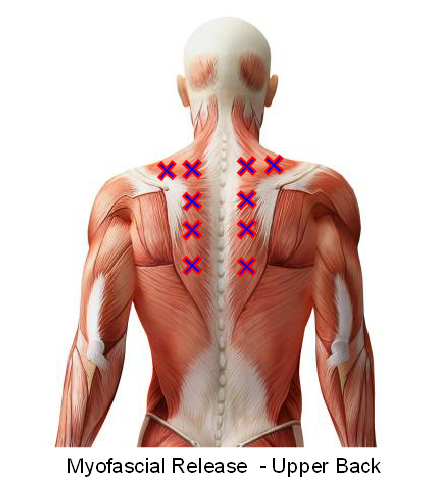
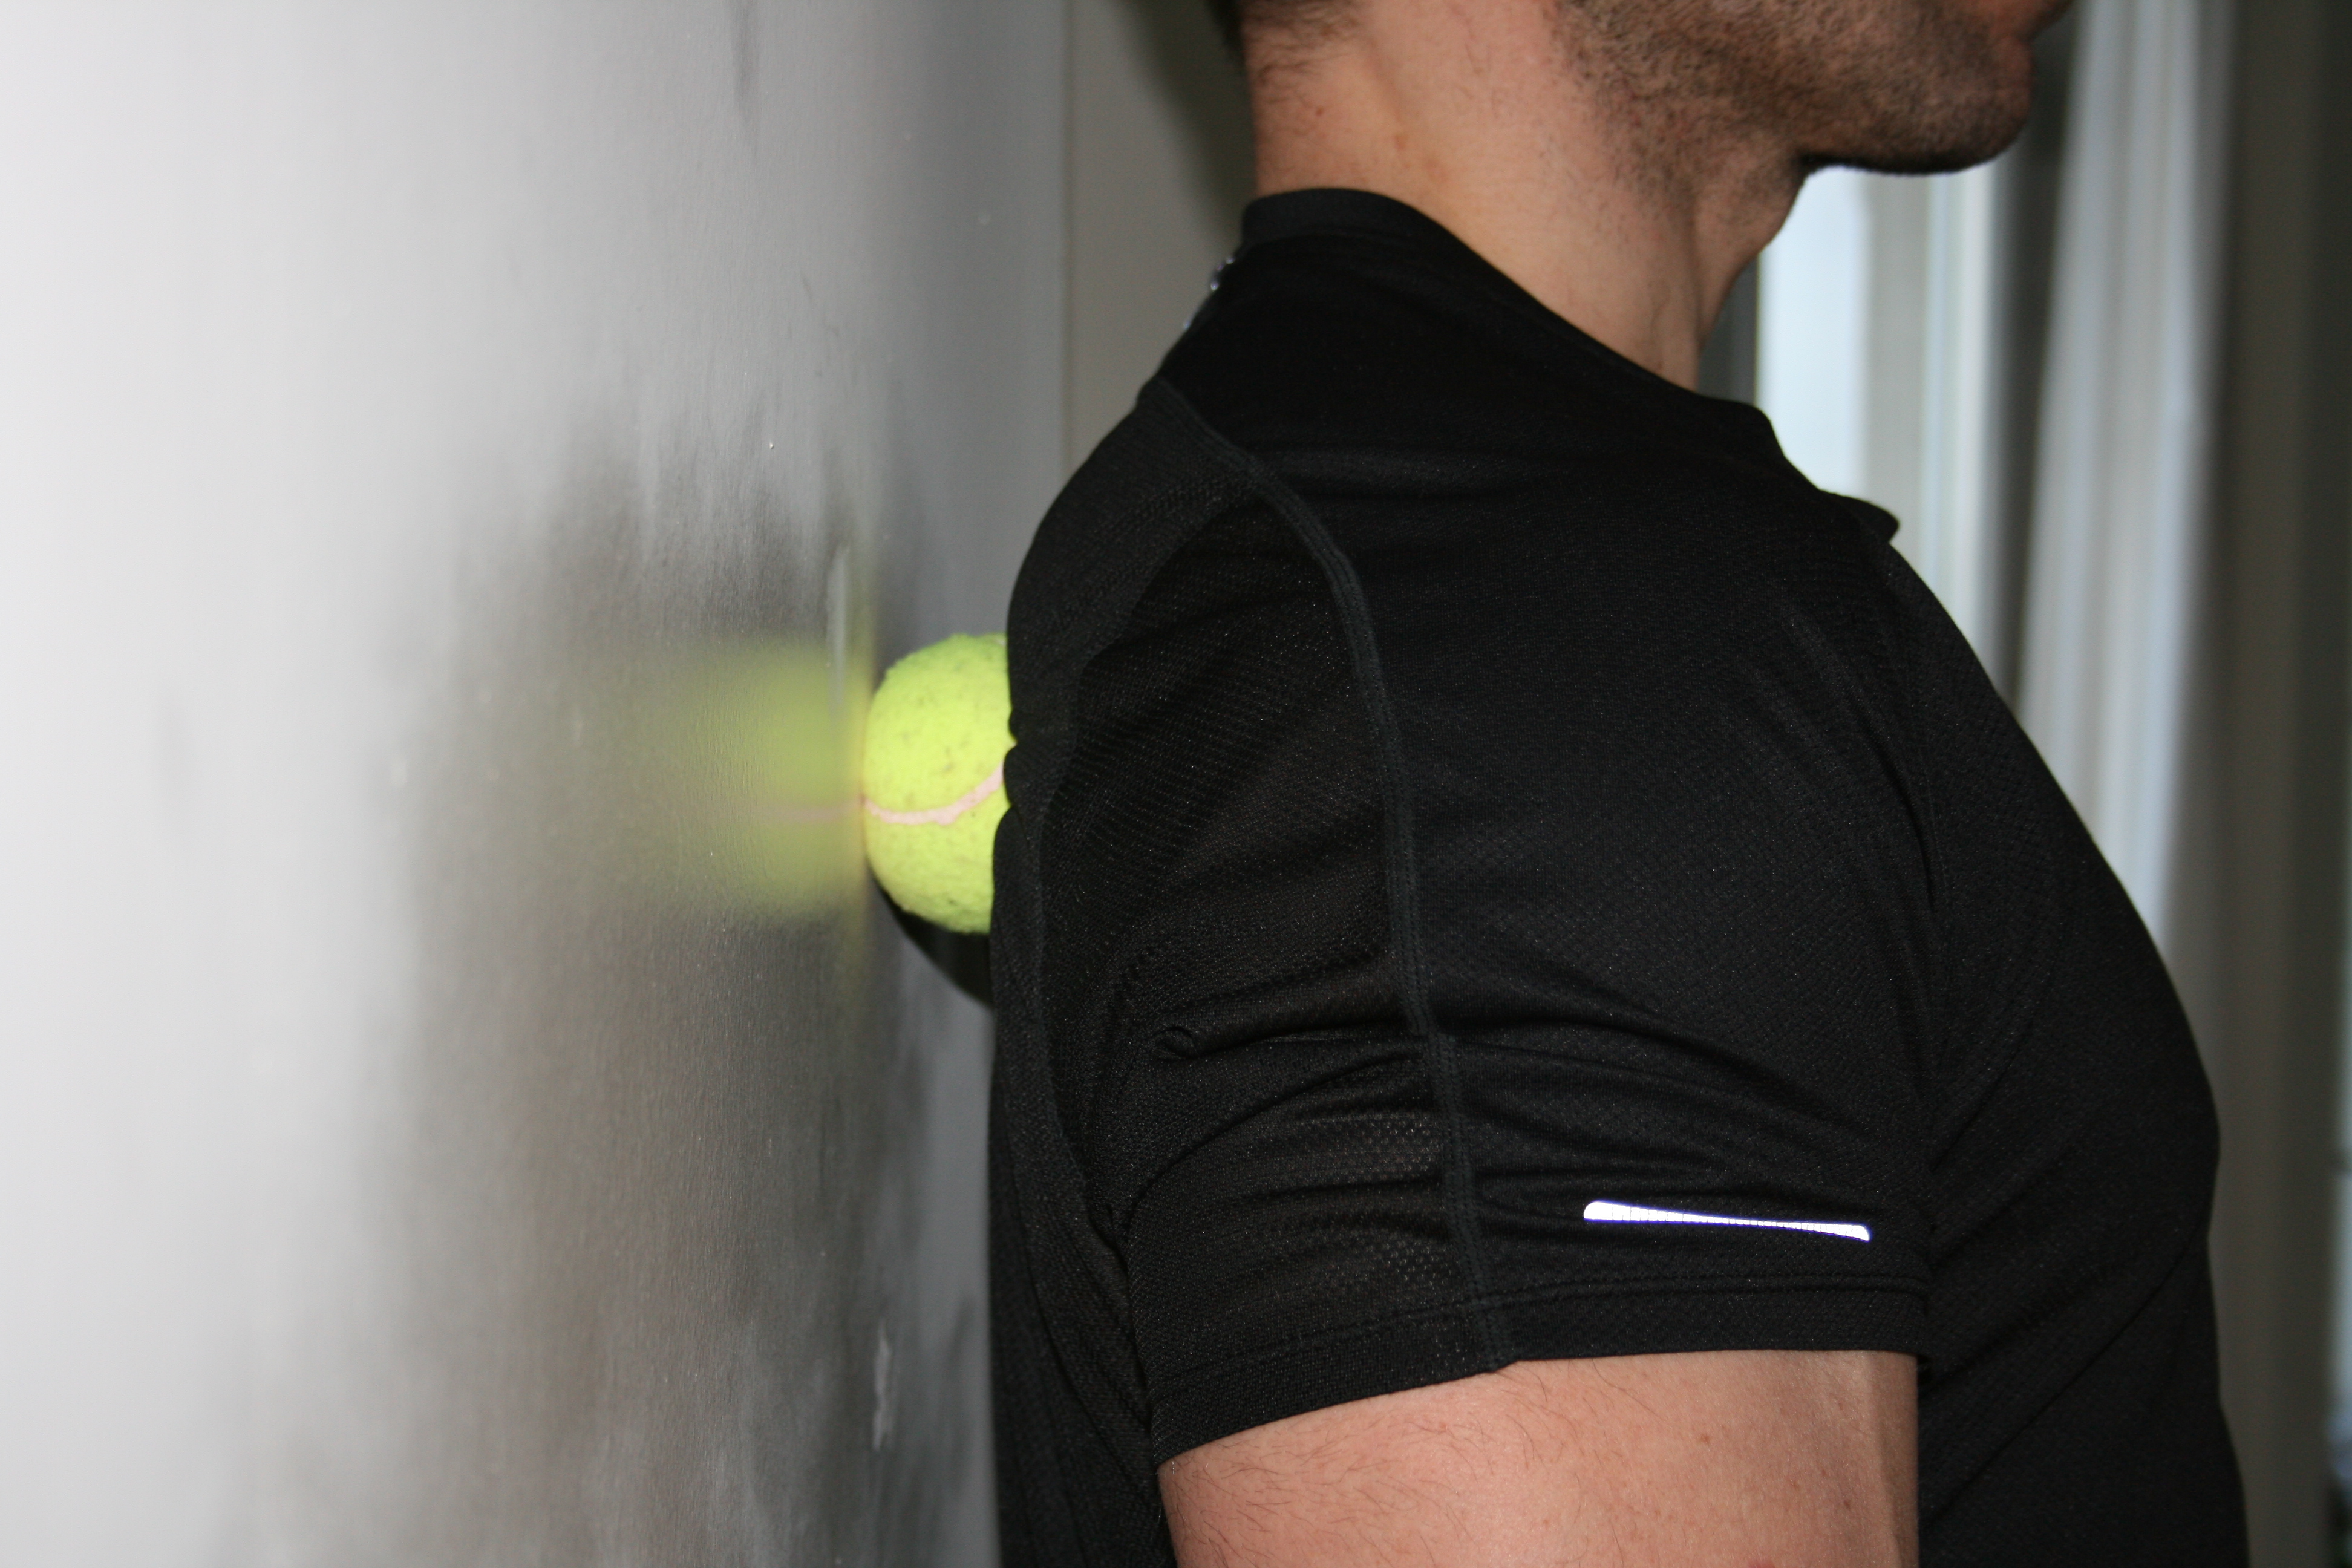
Place the tennis ball into the large ‘meaty’ area of the shoulder. The diagram that I have provided shows where you should be aiming to feel the trigger point areas. You will notice the shape here is like a capital L, turned upside down.
Start at the top of the muscle, work the ball into the tender spot until it subsides. This could be seconds or several minutes, it depends on how much tension your muscles are holding. Either hold the trigger point areas statically or move the ball around them. Try leaning back into the ball to increase the intensity of needed. Ideally hold the sensation until the tenderness subsides and then move on to the next area.
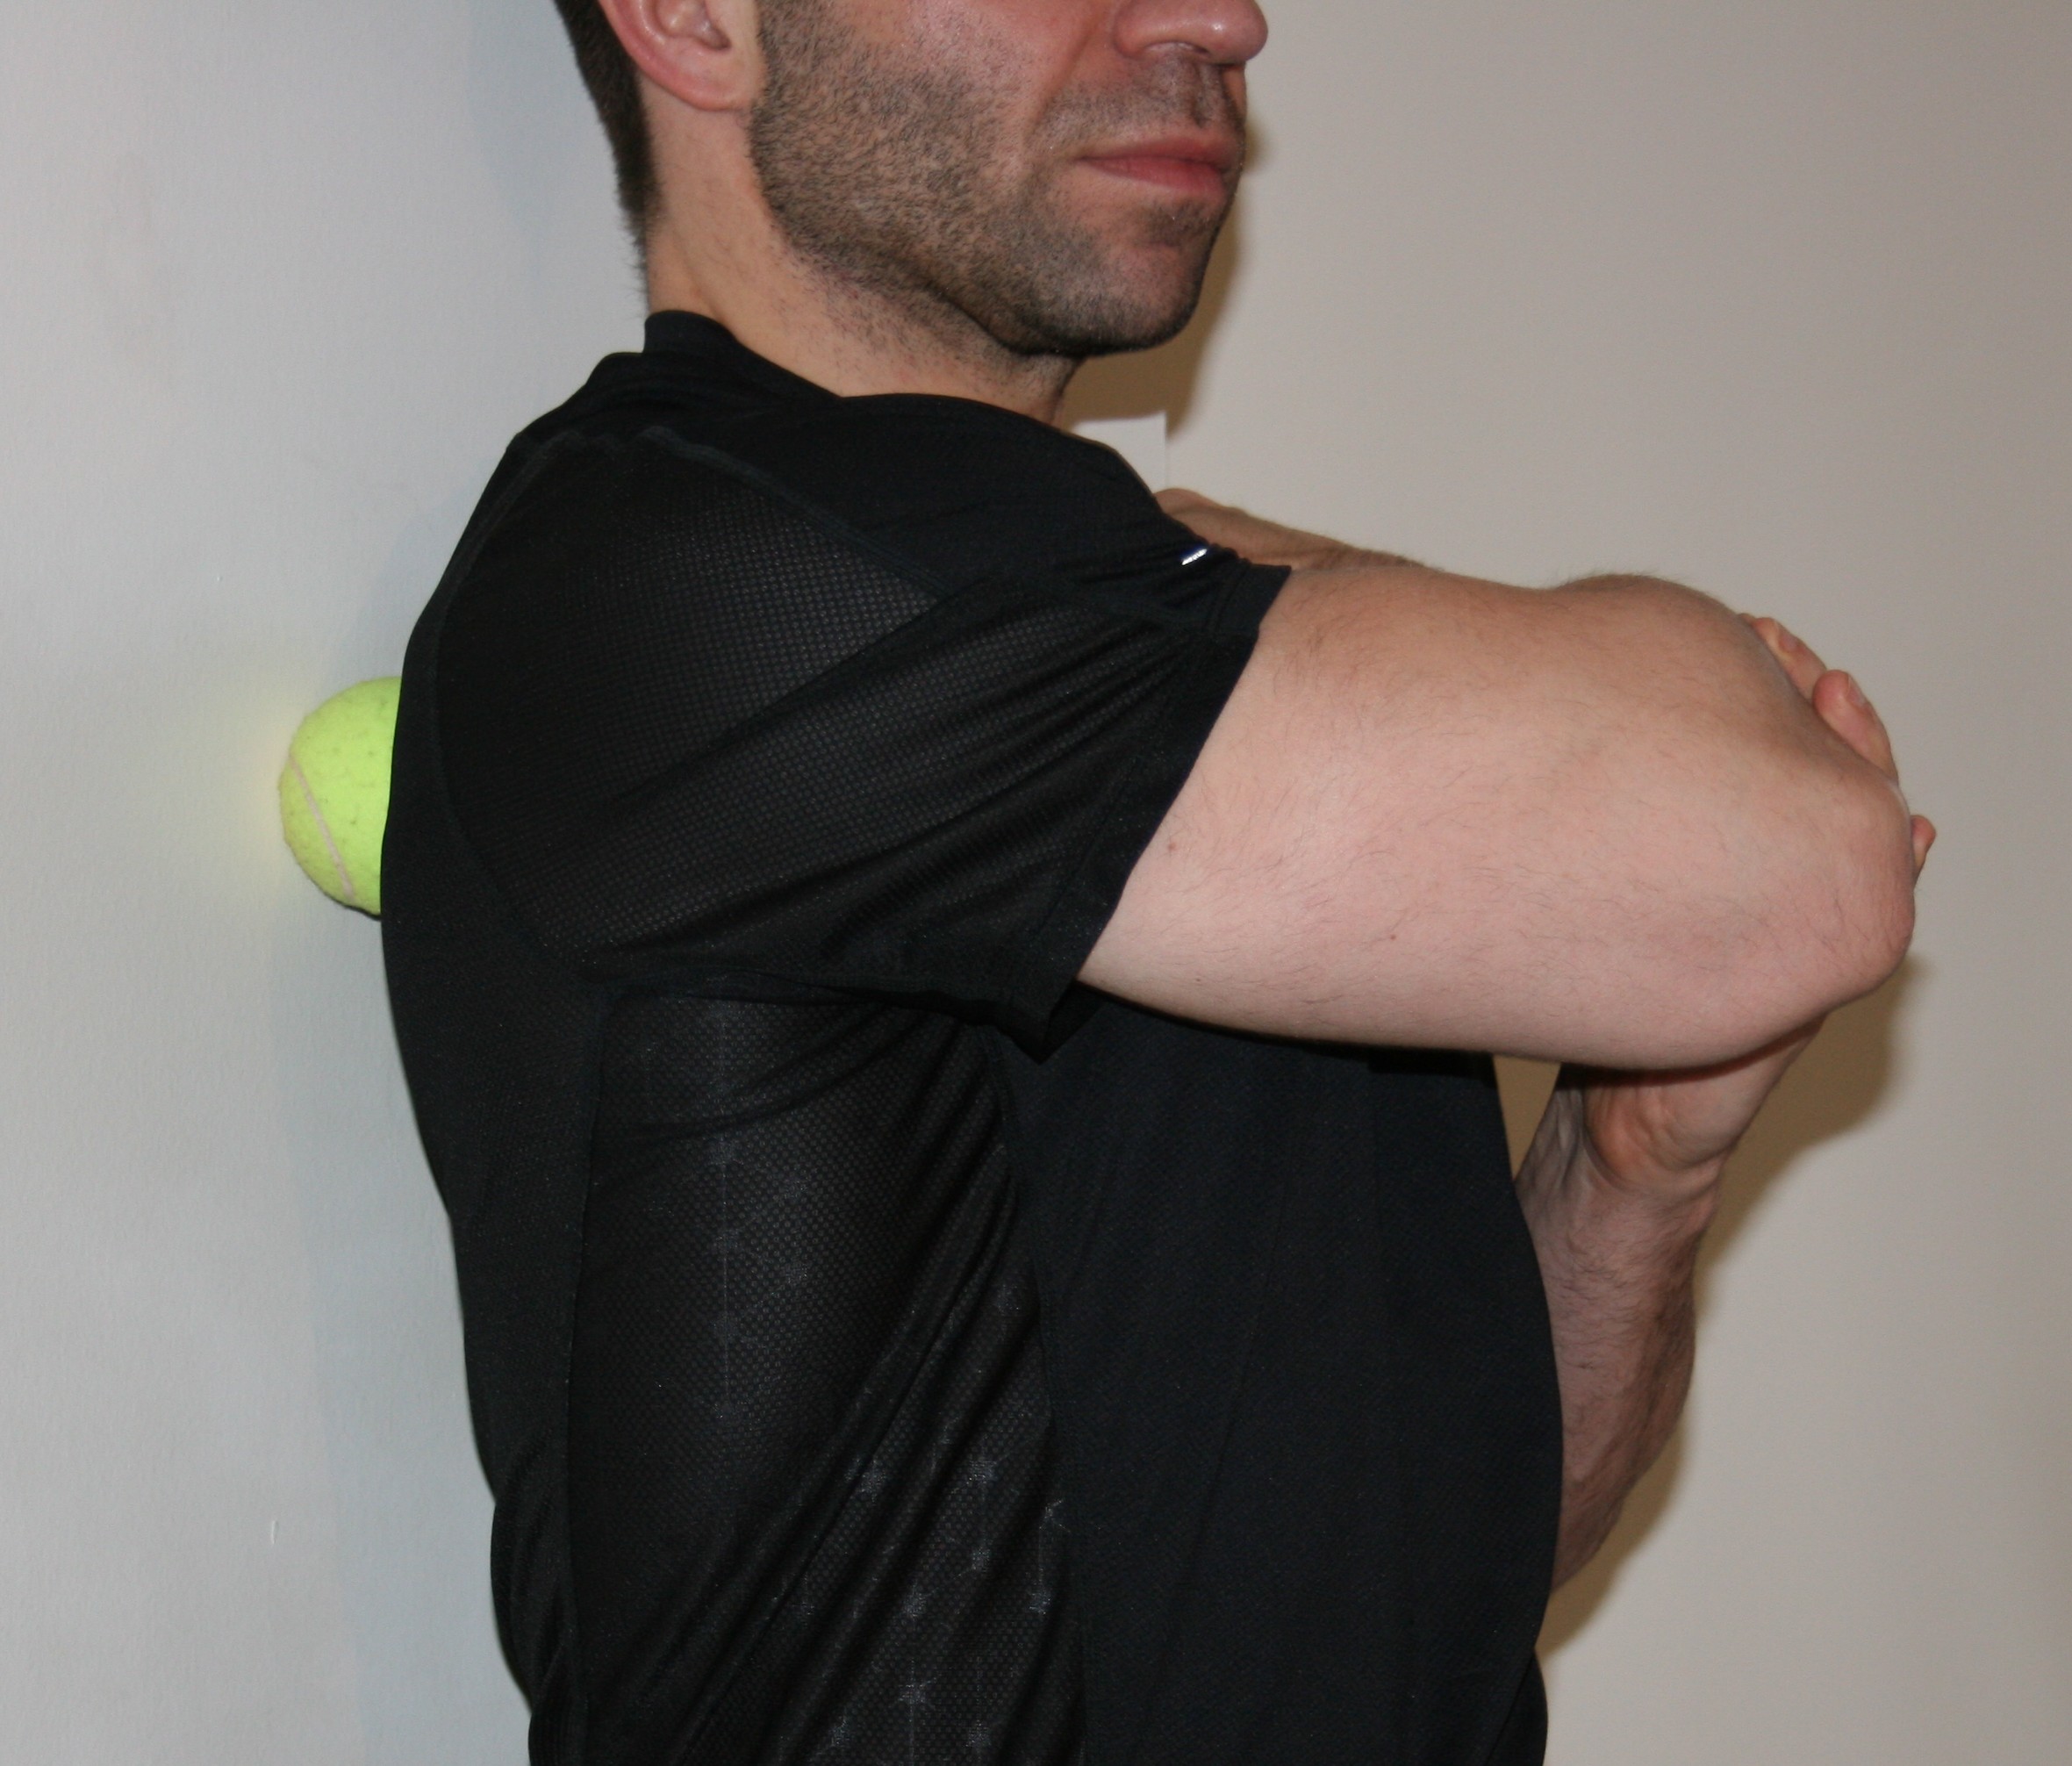 To increase the area that you can work on, place one hand across the chest and hold the hand on the opposite side shoulder. This will cause the shoulder-blade to move outward and will allow you access to trigger point the muscles in the area between the should blade and spine a little more deeply.
Remember, this experience may be a little tender, but please don’t be put off. It will subside with time and practice and will leave your muscles feeling lighter and more relaxed.
Lower Back Muscles – Use the foam roll.

Lay with the foam roll across your lower back as in the picture opposite. Turn to one side slightly so you are off the vertebrae in the spine. Curve your back slightly into the foam roll and move it up your body towards your mid back using your legs to control your movement.
Again you can hold the tender spots statically or you can roll over them and repeat. Work back down again, lean-to the other side and repeat. Keep changing sides and repeat ideally around 20 repetitions or until the tenderness in the muscle subsides.
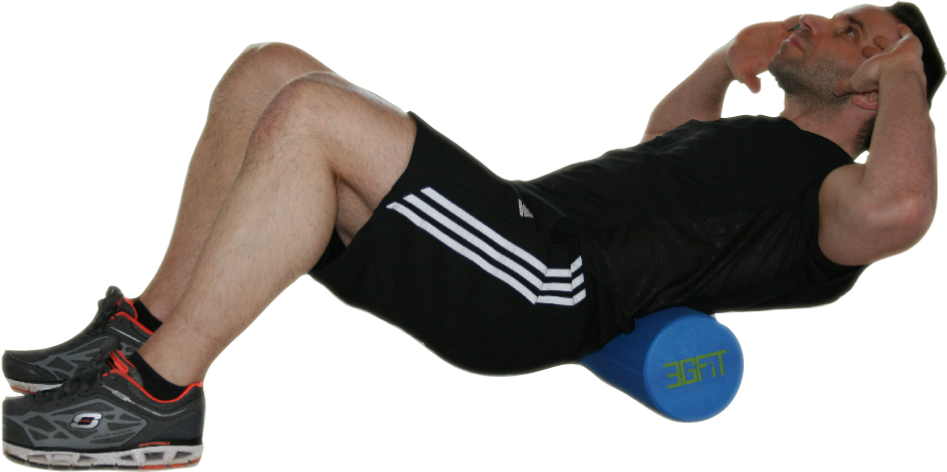
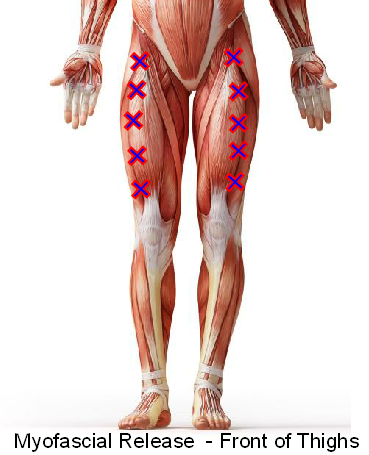
The Front of the Thighs (Quadriceps and Hip Flexors) – use the foam roll.
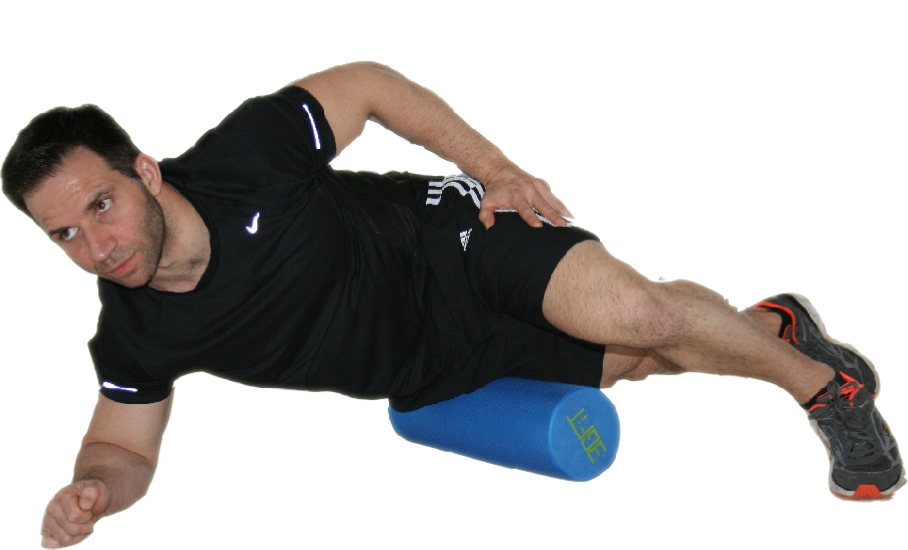
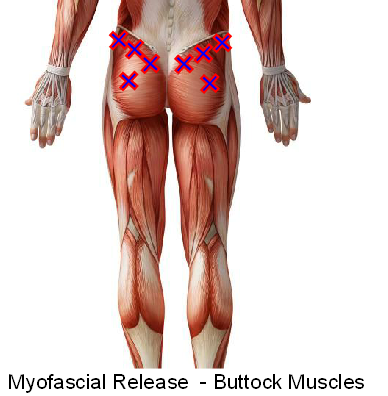
Buttock Muscles (Glutes) – Use the foam roll.

The glutes are big muscles so you may have to move around a little. Aim to roll toward the top of the glutes near the lower back, being careful to stay away from the spine and bones. Remember you can hold the trigger point statically or you can roll around slowly on it, around the sore spots.
Back of The Thighs (Hamstrings and Calf Muscles) – Use the foam roll.

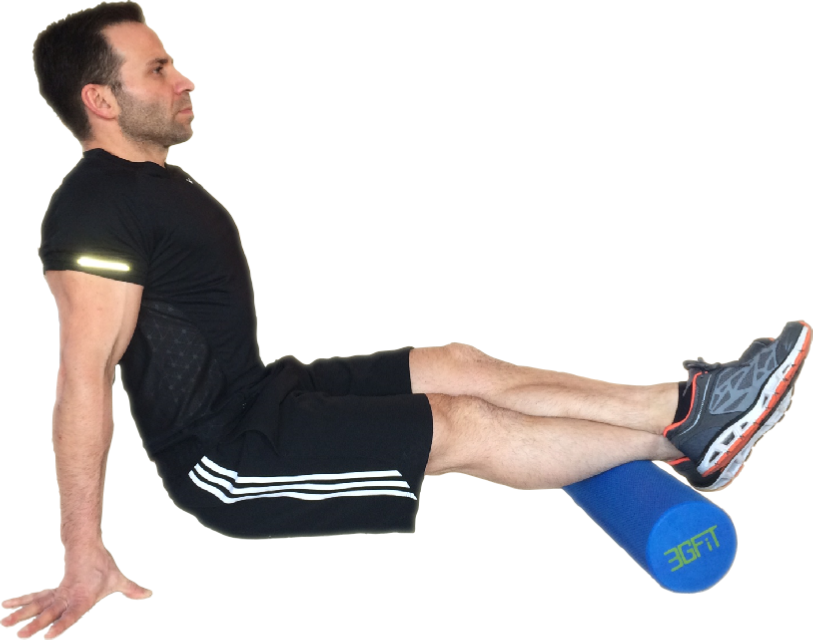
You can rest your other leg on top of the one (as in the picture) you are rolling to add extra weight and to increase the pressure if needed.
To get the most out of these exercises I would advise investing a minimum of at least 10 – 30 minutes daily to work on all of these exercises, until your muscle tension subsides. Please remember everyone is different and your needs may differ from others.
I would love to hear how you get on with this so please fill out my comment section below with your feedback. I will be covering the next step of fixing your office back with stretches and strengthening exercises that you need to do as part of the next phase over the next few weeks. Don’t forget to subscribe to have my posts emailed to you directly so you don’t miss anything.
Happy trigger pointing!


Fantastic!!! We all miss your abs & core class at DL kidbrooke! You rocked !!!!
Thank you Lisa that is so kind of you! For what it’s worth I miss teaching the class and seeing all of you guys too!
How do you know when to move onto the stretching phase and do you carry on with this release phase?
Hi Darren, thanks for the message. Foam rolling is about reducing the tightness and tension in the muscles. Stretching facilitates the de-stressed muscle to then become longer to improve flexibility. Ideally they should compliment each other. If for example you are foam rolling your hip flexors, you should then stretch them afterward for best results. You can continue foam rolling once your initial discomfort has passed as a means of maintenance. The benefit is it won’t hurt as much as you wont need to do it for as long.